Cutting Plane Line Dialog OptionsKeyCreator Drafting / Detail / Detail Line / Cutting Plane / Cutting Plane Line Dialog OptionsThe Cutting Plane Line dialog appears when Cutting Plane Line is selected from the Detail>Detail Lines>Cutting Plane (also used for Section View creation.) Through this tabbed dialog, you are able to configure letter, placement, projection type and arrow settings, attributes, and formatting options. The settings contained in the Cutting Plane Line page of this dialog are listed below.
Dialog Options: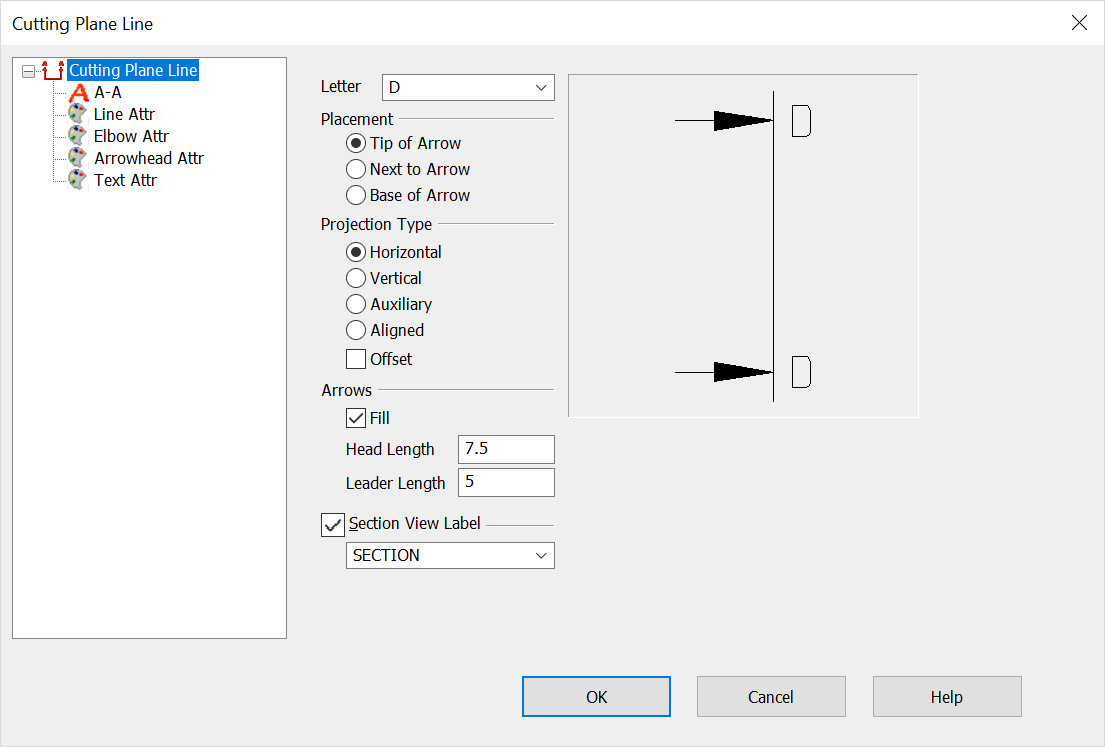 LetterSelect a letter from the drop-down menu to appear with the section view line. Placement
Projection TypeFour different projection types are available: Horizontal, Vertical, Auxiliary and Aligned. These names refer to the projection of the resulting view, not the plane being defined on the solid. Horizontal Projection
Vertical Projection
Auxiliary Projection
Aligned Projection
Offset ProjectionsWhen selected, you will be able to create an offset cutting plane line. The offset projection will appear in the Preview Window. 
Example of Offset Cutting Plane Lines Once enabled, you will be prompted to specify 45° corners or "bends" in the cutting line when using any of the four projection methods (see notes about Aligned projections, below). When you are finished creating corners, press ENTER to finish the cutting line selection. Using Offset for Aligned ViewsIf you choose to create an aligned section view with the offset checkbox enabled, you will be prompted to select corners (or bends) as described in the Offset Projections segment above. The difference is that an arc is created after the bend. This is useful for sectioning radial parts as shown below. If you choose the center of an arc for your bend point, the resulting section arc will have the same radius; this allows you to maneuver around objects accurately. 
Example of Offset Aligned Cutting Plane LinesThe pick-points in the example above show the steps required to create the section view illustrated. Note that steps 1 and 4 are the same point (the center of the part/arc. Also, remember to press ENTER when you have finished defining bends. ArrowsSpecify a value for both the Header and Leader Length settings.
|


