Creating Revision ReportRevision / Create Report / Creating Revision Report (1)
Caution: Closing the Report Edit Tab will end the current Revision session.

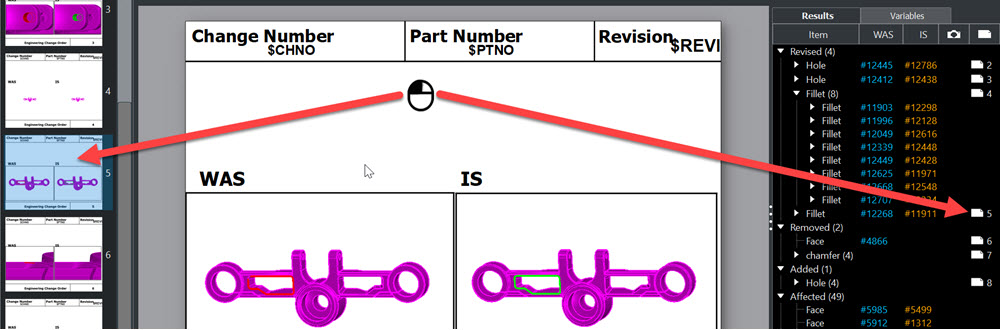
Sample Report
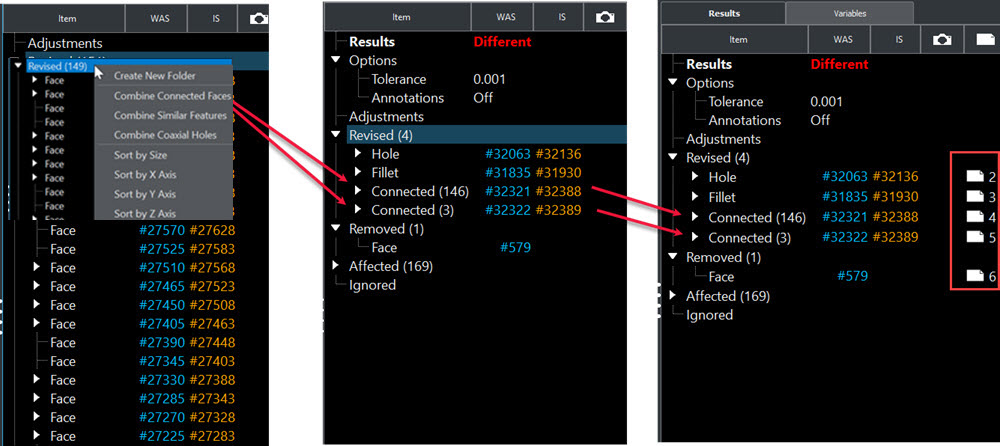
After a Compare, review Results Display, Adjust Tree content and then Create Report:
Create Report opens in edit mode; allows edits in Cover Page, Variables Tree and create individual Feature pages before Create Full Report is run.
Edit and adjust Report before Create Full Report
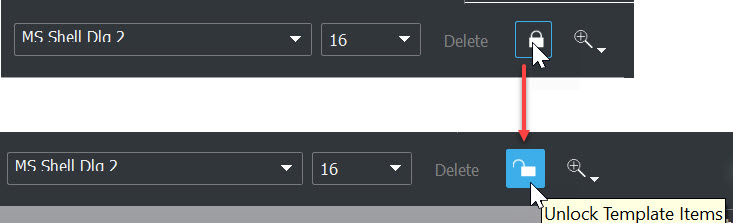
Note that newly created reports will open with the template items in a locked state. Clicking on text in the title page to edit for example, will not be possible. To allow for editing click the Lock Icon to unlock items:
Create a Page:

Add Variable to Page:

Pages created in Create Full Document
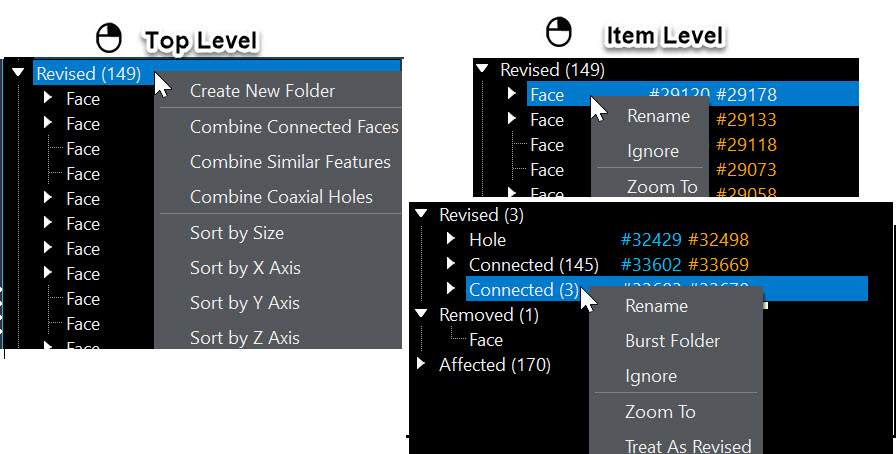
Top level differences:
Revised, Added and Removed — Features (holes, fillets for example), faces and created folders (groupings and new folder content) listed in top level will have a page created for each item:
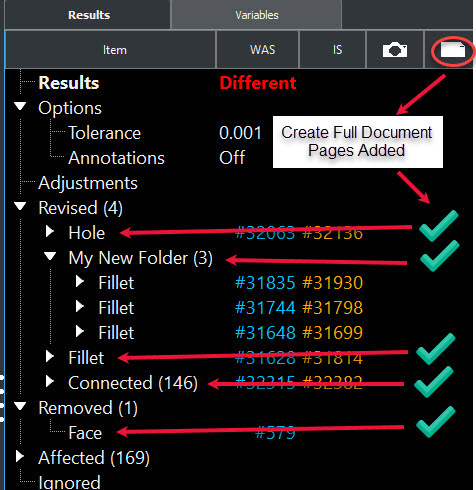
NOTE: Pages are not created for non-top level, Affected and Ignored tree items in Create Full Document, but can be added manually as described in Create a Page (listed above).
Full Document post edit before File>Save, Create Full Document run:
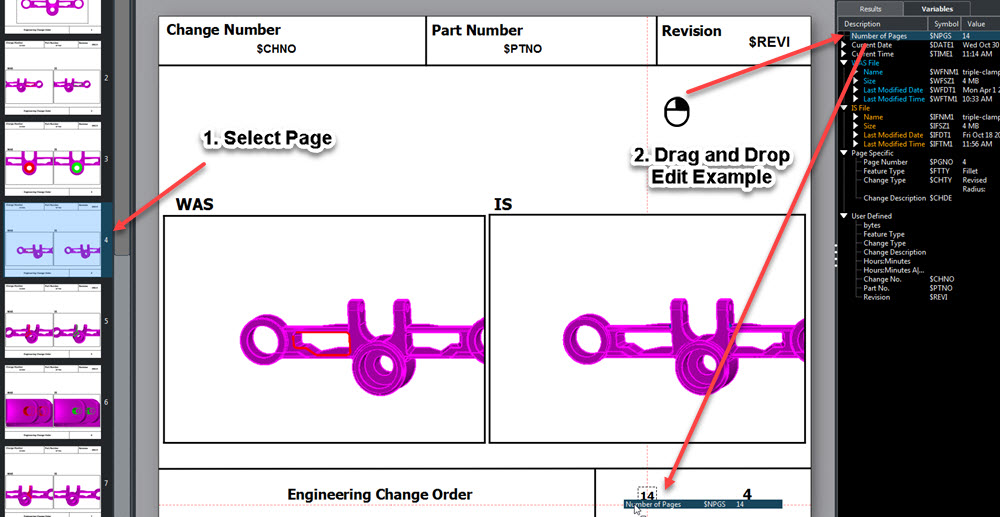
Display Page:
NOTE: Clicking and dragging a Feature page Up or down moves the page, moving page 5 down re-numbers it to page 6 and 6 then becomes page 5 for example. The keyboard functions Page up/down, arrow up/down and Home/End,(home = first page, end = last page) can also be used to move to a page when no active selection or text edit is being used.
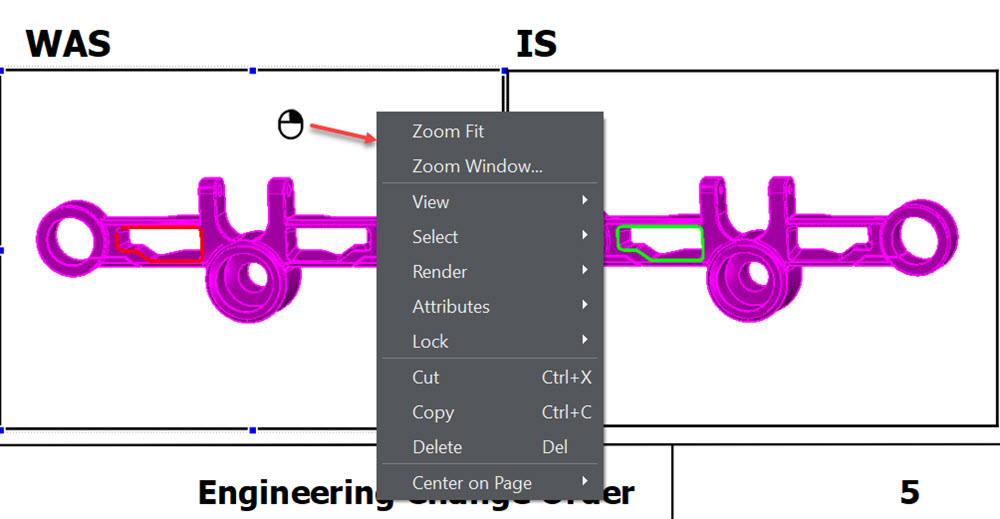
Image Context Menu:
Page Context Menu:
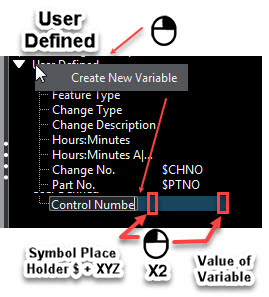
Adding User Defined Variables:
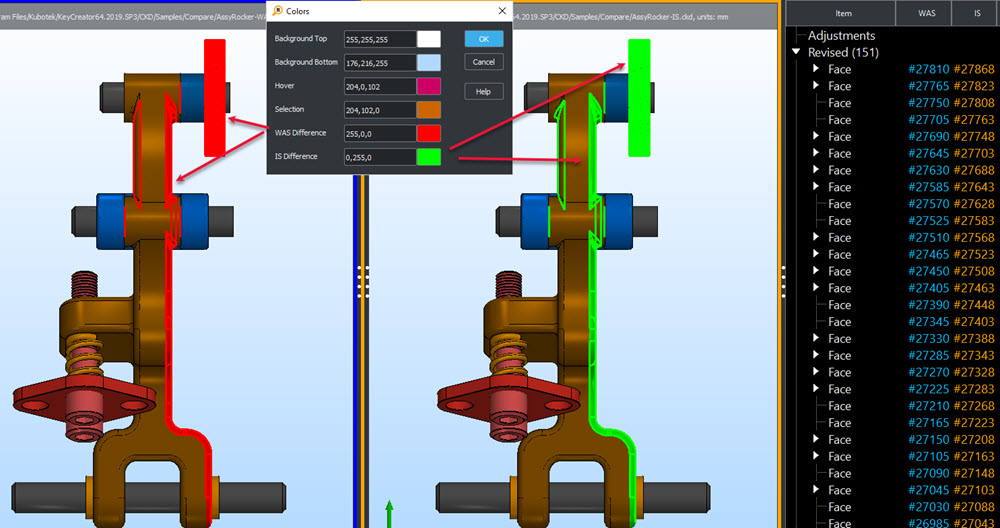
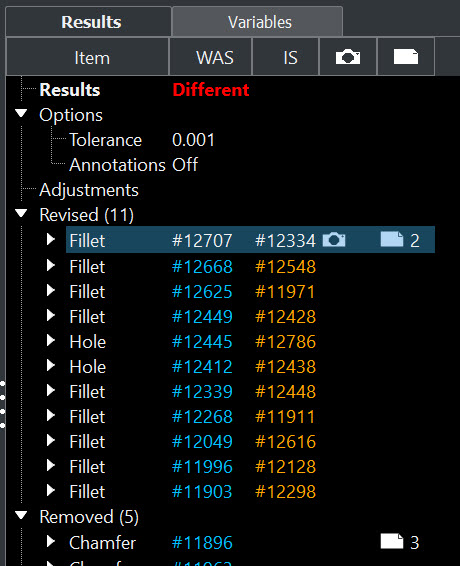
Results Tree:
The result tree in the report reflects the Compare session results.
Pages can be created manually by right clicking a feature item before Create full Report is run. This allows either a custom report creation (you choose the pages needed and File>Save) or after creating pages manually choose Create Full Report to fill in the rest of the feature pages.
A saved view orientation can be created for a feature item by clicking on the Camera column for that item.
Note: Files can be saved as SVG (universal scalable vector graphics, broswer readable) and/or File>Print and save to PDF. SVG files are readable in a web browser.
|